
How To Make A Double Exposure In Photoshop
The first thing you need to do is the download the necessary files:
1. Open a new document: Landscape format 5120*2880 pixels, resolution 300 pixels/inch, color mode RGB, 8 bit, background contents transparent
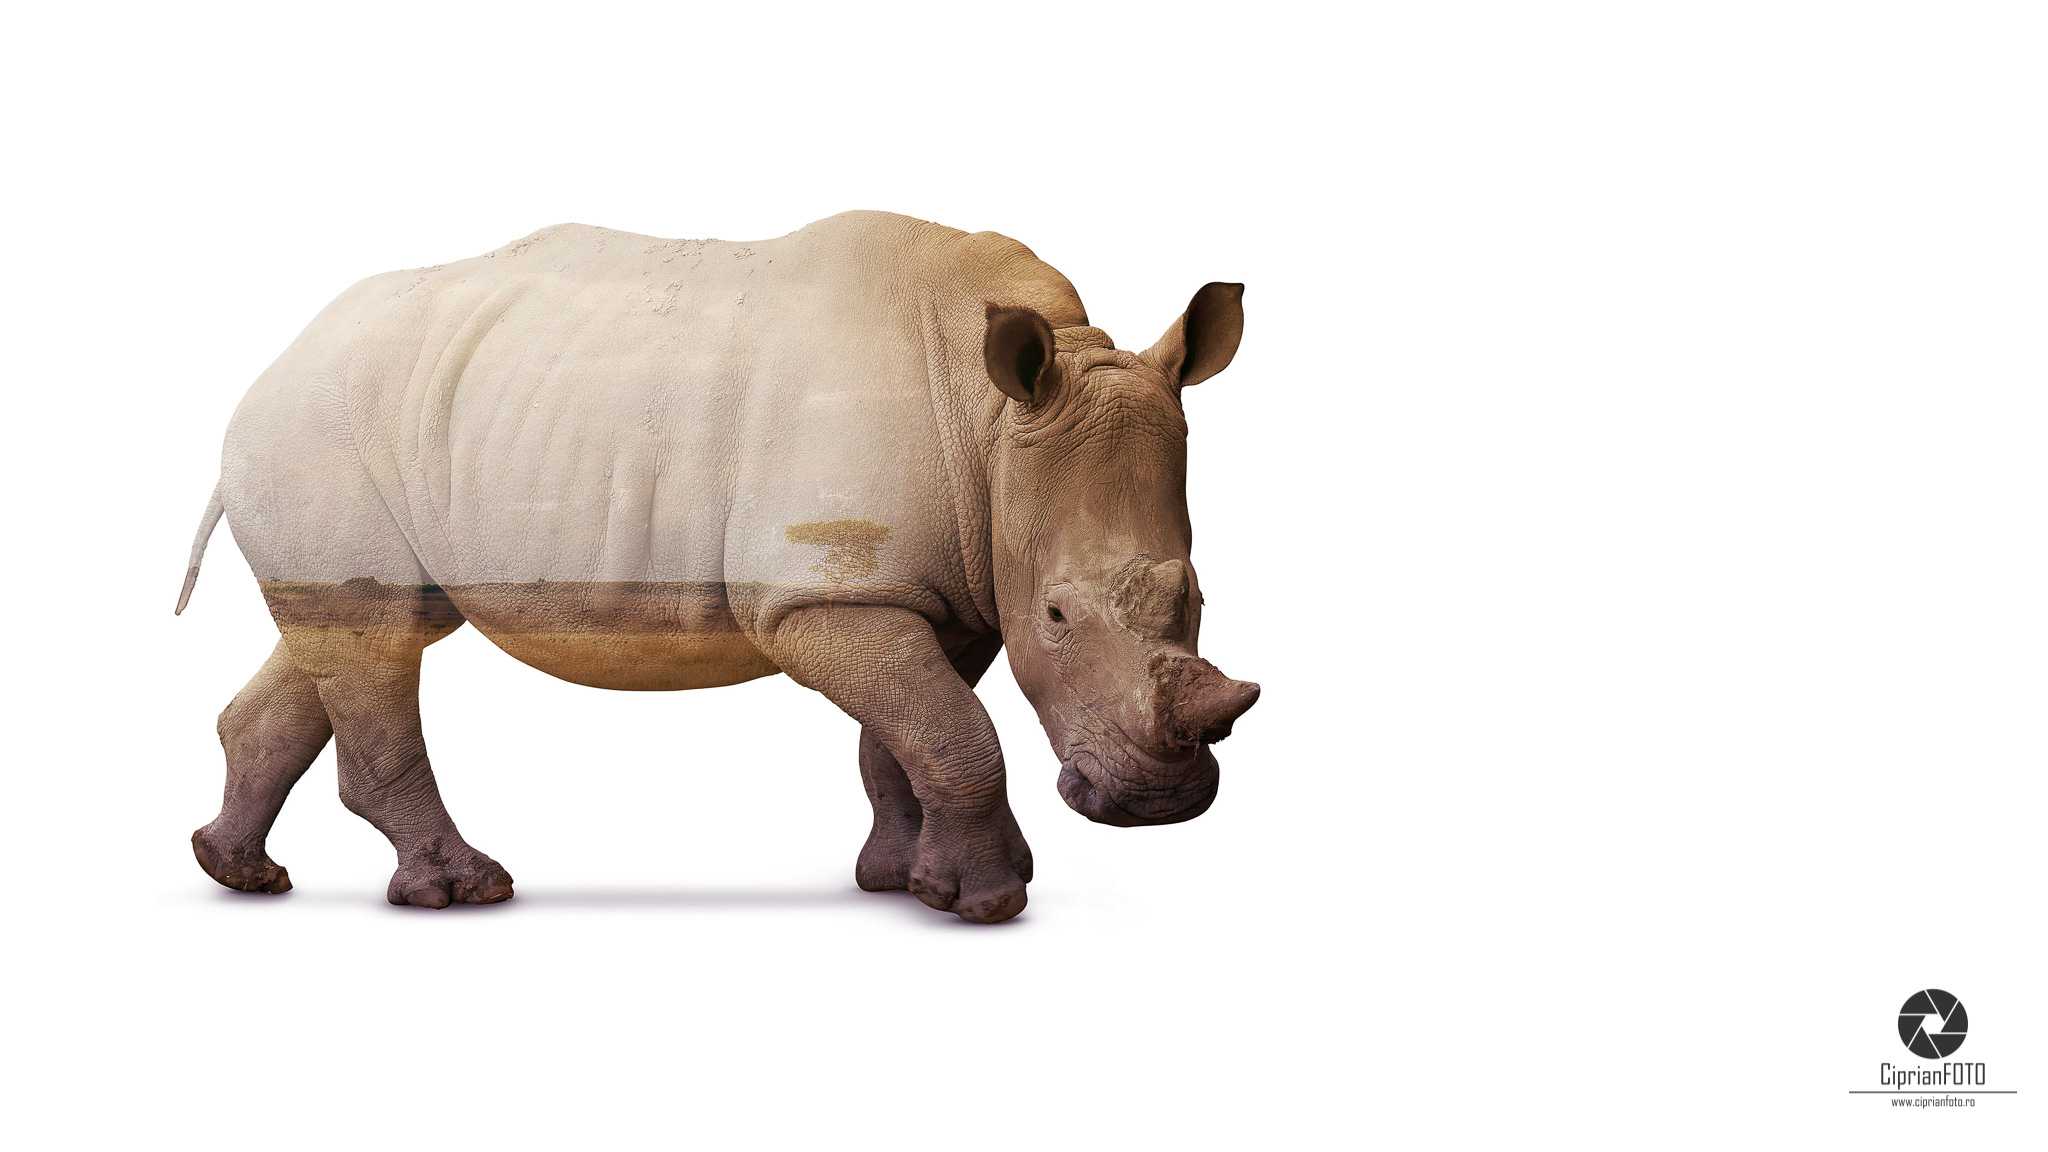
2. Open Rhino.jpg in Photoshop.
3. Open African landscape.jpg, and use Move Tool (V) for add the image above the rhino.
Work in the Layers panel
4. Click the African landscape layer to select it.
5. Select “Screen” from the blend modes drops down.
6. Lower opacity to about 76%.
7. Add a Layer Mask. Click the “Add layer mask” icon at bottom of Layers palette.
8. Select the Brush Tool (B) and adjust brush size and hardness from the top palette. Set fore/background to default Black/White.
9. Paint with black on the Layer Mask to reveal more detail on the rhino layer, or paint with white to hide detail: Make sure the white thumbnail on the African landscape layer is selected when you paint.
10. Add adjustment layer: Click “Add a new fill or adjustment layer” icon at bottom of Layers palette, then choose Gradient.
11. Choose a gradient color combo, OK.
12. Choose the “Overlay” blend mode.
13. Lower opacity to about 60%, and fill to 70%.
That’s it! We’re Done.