
How To Make New Background With Photoshop
Learn how to replace a background with another photo to make an image more interesting. Prep your project and let’s started!! Steps below.
- In the first phase, you need to crop the subject away from the background.
- Add adjustment layer: Brightness/Contrast – Add Clipping Mask (ALT+CLICK) – Set (+)100 at Contrast – Set (-)100 at Brightness — To see more clearly outline the subject.
- Select Quick Selection Tool (W) – Select Subject — And if the selection is not accurate we will improve it using the Quick Selection Tool (W).
- Delete adjustment layer: Brightness/Contrast.
- Choose the Quick Selection Tool (W) – Select and Mask – Set the Radius to 3 px – check SMART RADIUS – At the Global Refinement – Set the Smooth to 5 – Set the Feather to 1.3 px – After that with Refine Edge Brush Tool (R), we remove the imperfections around the subject – At Output Settings – Output to – Set to – New Layer – OK.
- Add a new layer and name it green screen – Choose Paint Bucket Tool (G) – Choose a green color from the Swatches – After that, we remove the other imperfections of the subject using steps from up.
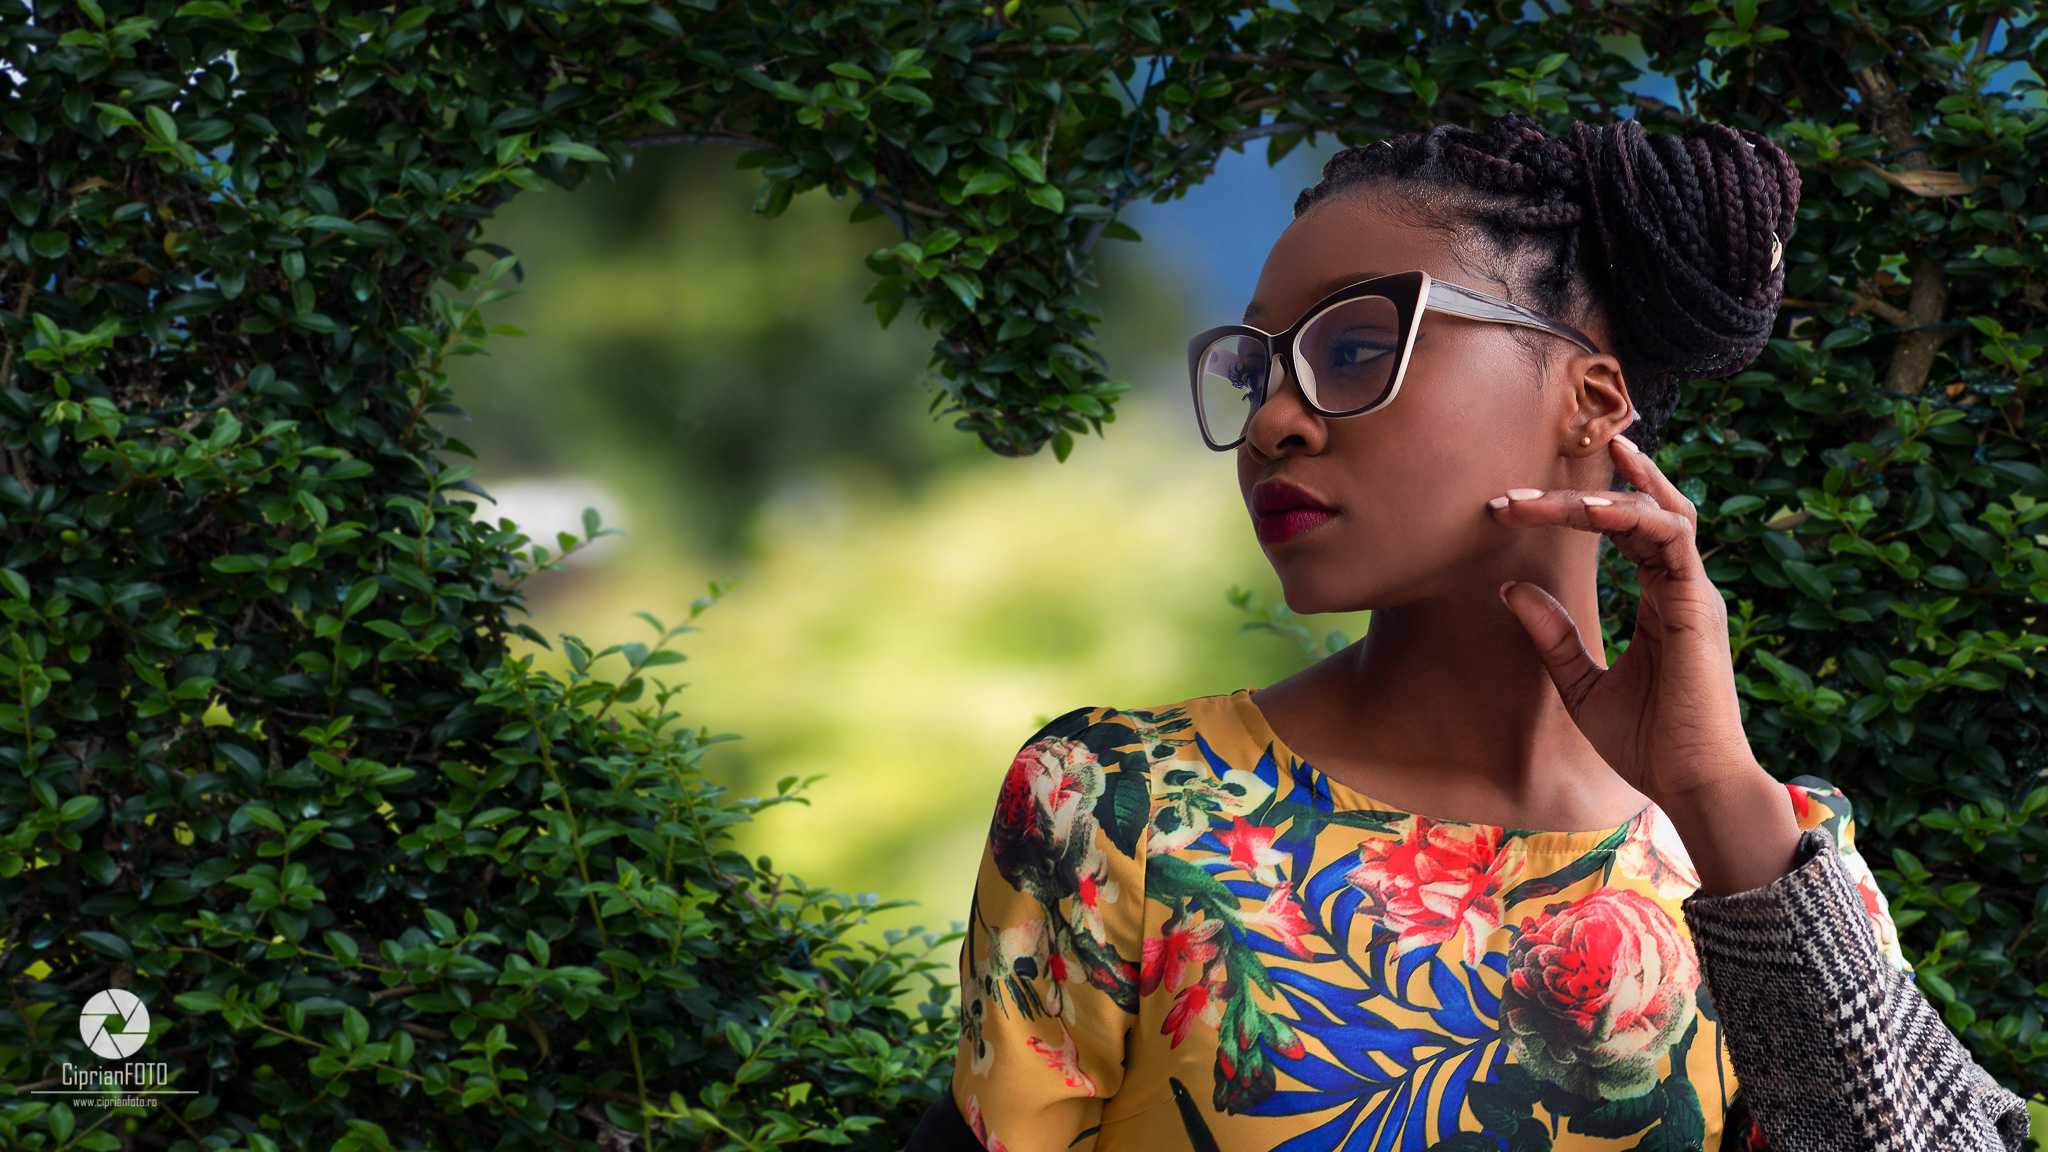
- Open the image background, in this case, a garden, and make a copy of this, and name it Blur.
- Import the subject layer (= female portrait) and Convert to Smart Object and you can put the female subject where you want in the frame.
- Choose the layer named Blur – You need to go at Filter menu – Blur – Gaussian Blur – Set the Radius to 3 Pixels – OK.
- To have a blur garden you must make another copy of the Blur layer and put at the top of the subject.
- Add another blur filter, now for the subject, for that, you need to go at Filter menu – Blur – Average – Add Clipping Mask (ALT+CLICK) – Blend Mode change it from Normal – Soft Light – Lower opacity to about 45%.
- Add adjustment layer: Click “Add a new fill or adjustment layer” icon at bottom of Layers palette, then choose Solid Color.
- Choose a dark blue from the picker (#080c56) – OK – Blend Mode change it from Normal – Soft Light – Lower opacity to about 50%.
That’s it! We’re Done.
WATCH VIDEO:
STOCK IMAGES:
STOCK MUSIC:
… [Trackback]
[…] Read More here on that Topic: ciprianfoto.ro/how-to-make-new-background-with-photoshop/ […]
… [Trackback]
[…] There you can find 52361 more Info on that Topic: ciprianfoto.ro/how-to-make-new-background-with-photoshop/ […]
… [Trackback]
[…] Find More Info here on that Topic: ciprianfoto.ro/how-to-make-new-background-with-photoshop/ […]
… [Trackback]
[…] Read More Information here to that Topic: ciprianfoto.ro/how-to-make-new-background-with-photoshop/ […]
… [Trackback]
[…] Read More to that Topic: ciprianfoto.ro/how-to-make-new-background-with-photoshop/ […]
… [Trackback]
[…] Read More to that Topic: ciprianfoto.ro/how-to-make-new-background-with-photoshop/ […]
… [Trackback]
[…] Find More Information here to that Topic: ciprianfoto.ro/how-to-make-new-background-with-photoshop/ […]
… [Trackback]
[…] Read More Info here on that Topic: ciprianfoto.ro/how-to-make-new-background-with-photoshop/ […]
… [Trackback]
[…] Information to that Topic: ciprianfoto.ro/how-to-make-new-background-with-photoshop/ […]
… [Trackback]
[…] Read More Information here on that Topic: ciprianfoto.ro/how-to-make-new-background-with-photoshop/ […]
… [Trackback]
[…] Information on that Topic: ciprianfoto.ro/how-to-make-new-background-with-photoshop/ […]
… [Trackback]
[…] Find More Information here to that Topic: ciprianfoto.ro/how-to-make-new-background-with-photoshop/ […]
… [Trackback]
[…] Read More on to that Topic: ciprianfoto.ro/how-to-make-new-background-with-photoshop/ […]
… [Trackback]
[…] Read More to that Topic: ciprianfoto.ro/how-to-make-new-background-with-photoshop/ […]
… [Trackback]
[…] Info on that Topic: ciprianfoto.ro/how-to-make-new-background-with-photoshop/ […]
… [Trackback]
[…] Find More here to that Topic: ciprianfoto.ro/how-to-make-new-background-with-photoshop/ […]
… [Trackback]
[…] Info to that Topic: ciprianfoto.ro/how-to-make-new-background-with-photoshop/ […]
… [Trackback]
[…] Read More to that Topic: ciprianfoto.ro/how-to-make-new-background-with-photoshop/ […]
… [Trackback]
[…] Information to that Topic: ciprianfoto.ro/how-to-make-new-background-with-photoshop/ […]
… [Trackback]
[…] Find More Information here to that Topic: ciprianfoto.ro/how-to-make-new-background-with-photoshop/ […]
… [Trackback]
[…] Info on that Topic: ciprianfoto.ro/how-to-make-new-background-with-photoshop/ […]
… [Trackback]
[…] Find More to that Topic: ciprianfoto.ro/how-to-make-new-background-with-photoshop/ […]
… [Trackback]
[…] Find More here to that Topic: ciprianfoto.ro/how-to-make-new-background-with-photoshop/ […]
… [Trackback]
[…] Information to that Topic: ciprianfoto.ro/how-to-make-new-background-with-photoshop/ […]
… [Trackback]
[…] Info to that Topic: ciprianfoto.ro/how-to-make-new-background-with-photoshop/ […]
… [Trackback]
[…] Find More on on that Topic: ciprianfoto.ro/how-to-make-new-background-with-photoshop/ […]
… [Trackback]
[…] Read More on to that Topic: ciprianfoto.ro/how-to-make-new-background-with-photoshop/ […]
… [Trackback]
[…] There you will find 94165 additional Info to that Topic: ciprianfoto.ro/how-to-make-new-background-with-photoshop/ […]
… [Trackback]
[…] Find More Information here on that Topic: ciprianfoto.ro/how-to-make-new-background-with-photoshop/ […]
… [Trackback]
[…] Find More to that Topic: ciprianfoto.ro/how-to-make-new-background-with-photoshop/ […]
… [Trackback]
[…] There you can find 81602 additional Info on that Topic: ciprianfoto.ro/how-to-make-new-background-with-photoshop/ […]
… [Trackback]
[…] Here you will find 70553 additional Info on that Topic: ciprianfoto.ro/how-to-make-new-background-with-photoshop/ […]
… [Trackback]
[…] There you can find 56221 additional Info on that Topic: ciprianfoto.ro/how-to-make-new-background-with-photoshop/ […]
… [Trackback]
[…] There you will find 6642 additional Info to that Topic: ciprianfoto.ro/how-to-make-new-background-with-photoshop/ […]
… [Trackback]
[…] Find More to that Topic: ciprianfoto.ro/how-to-make-new-background-with-photoshop/ […]
… [Trackback]
[…] Find More on to that Topic: ciprianfoto.ro/how-to-make-new-background-with-photoshop/ […]
… [Trackback]
[…] Read More here on that Topic: ciprianfoto.ro/how-to-make-new-background-with-photoshop/ […]
… [Trackback]
[…] Read More to that Topic: ciprianfoto.ro/how-to-make-new-background-with-photoshop/ […]
… [Trackback]
[…] Read More on that Topic: ciprianfoto.ro/how-to-make-new-background-with-photoshop/ […]
… [Trackback]
[…] Find More here on that Topic: ciprianfoto.ro/how-to-make-new-background-with-photoshop/ […]
… [Trackback]
[…] There you can find 71748 additional Info to that Topic: ciprianfoto.ro/how-to-make-new-background-with-photoshop/ […]
… [Trackback]
[…] Here you can find 85960 more Information to that Topic: ciprianfoto.ro/how-to-make-new-background-with-photoshop/ […]
… [Trackback]
[…] Here you can find 75682 more Info on that Topic: ciprianfoto.ro/how-to-make-new-background-with-photoshop/ […]
… [Trackback]
[…] Here you will find 9731 more Info to that Topic: ciprianfoto.ro/how-to-make-new-background-with-photoshop/ […]
… [Trackback]
[…] Find More on that Topic: ciprianfoto.ro/how-to-make-new-background-with-photoshop/ […]